Breakfast Bombs! These are one of Richard's favorite breakfast meals. I usually make several of these at a time and put them in the freezer as freezer meals. I always plan my meals ahead so when I plan on fixing one of these, I just take it out of the freezer the night before and put them in the fridge. These can also be microwaved but remove them from the aluminum pans first. So lets get started!
I made 10 of these but could have easily stretched it to 12. These are so easy, just add what you like. This is what I used...
18 eggs, scrambled
2 lbs sausage
10 hash browns
1 can mushrooms (2 cans shown, but I only used one)
cheddar cheese (this is actually Fiesta Blend and I bought a huge bag for other stuff too so not all of this was used on these). LOL!
~~~~~~~~~~~~~~~~~~~~~~~~~~~~~~~~~~~~~~~~~~~~~~~~
I used 10 of these mini loaf pans. 5/.88 cents. If you want to be really thrifty you could reuse these.
Make sure to spray your pans so nothing sticks.
I fried my hash browns. Richard likes them a little crispy. You could also bake these. I should have just used my griddle but I didn't want to dig it out.
Dump the 2 pounds of sausage in a large skillet.
Fry it and drain well...
Dump all 18 eggs in a bowl. If you don't like a lot of eggs you can use less.
I added a tiny bit of milk, salt and pepper.
Eggs are all finished and in a bowl...
Now to start assembling them...
Start with the hash browns. Put them in the pans first. They are a perfect fit!
Put a good layer of sausage on top of the hash browns. I just split up the 2 lbs of sausage in the 10 pans.
Evenly distribute the scrambled eggs on top of the sausage.
Add the mushrooms...
Completely cover with cheese! When these are heated up, the cheese will melt and sorta drip down through on everything else. At this point, just cover with foil and put in the freezer!
To reheat all you do is...thaw them in the fridge the night before and heat in the oven at 350 for about 10-12 minutes or until the cheese is melted. Everything is cooked ahead of time so all you are doing is heating it up and melting the cheese. You can also remove these from the pans and microwave them.
Now we will break the cost down.... Now these babies are filled to the top so unless you are a hearty eater you could stretch these to 12 or more. I ended up with 10! The cost of food for 10 of these breakfast bombs was $19.44. So divide that out and it comes to $1.94 each! That's not a bad price at all for a good hearty breakfast! The last time that I made these I used less eggs and no mushrooms and the cost of those came to $1.64 each so you can see the price will vary a little depending on what you put in them.
When I fix these, I usually make Richard a couple pieces of toast to go with them. Having these already made and ready to heat up sure helps me out when I am fixing him breakfast at 4:30am before work.
UPDATE... This was this morning when I took it out of the oven. The cheese was melted and it smelled sooooo good. He usually just dumps it out of the little pan and into his plate.
PLEASE SHARE!!!
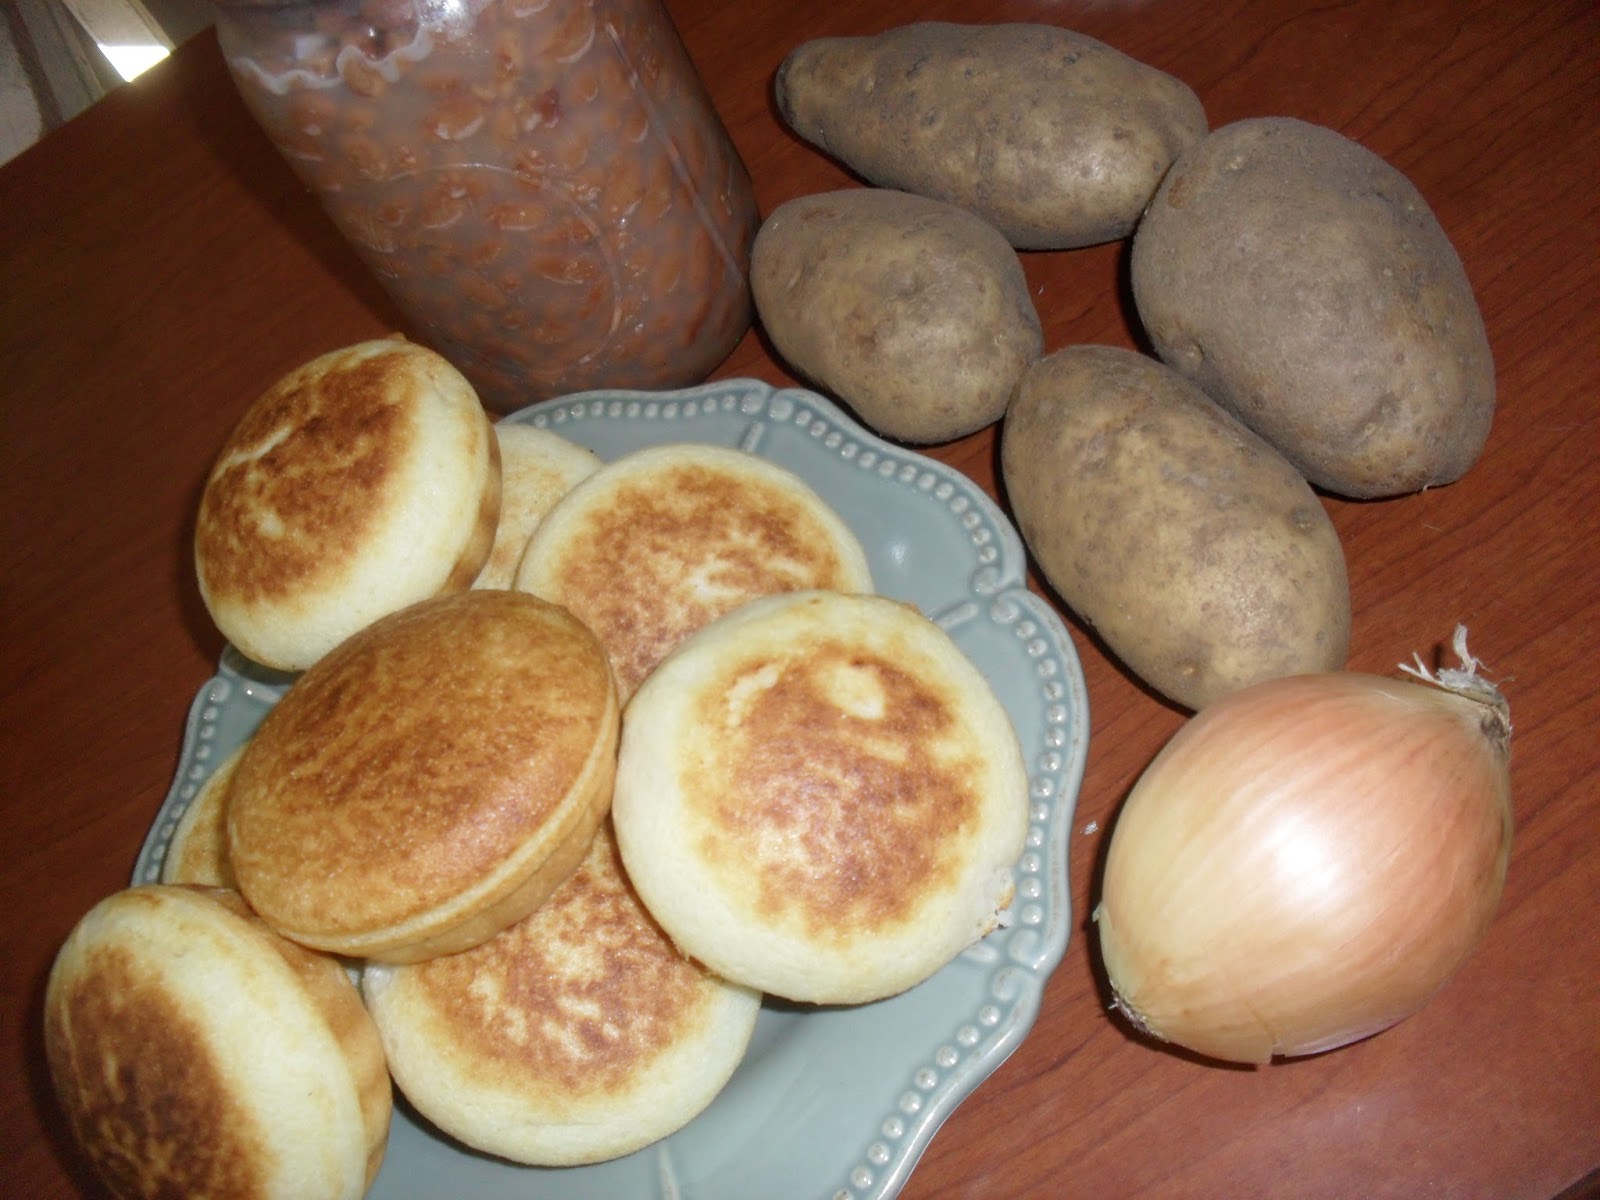
What's for supper? Richard asked for soup beans so I just popped open a jar and heated them up! So fast and easy when you can them.
Richard likes soup beans, fried potatoes, and cornbread crumbled up in a big bowl with some diced onion mixed in.
This is such a quick mean for me to fix when I already have the pinto beans canned and the cornbread in the freezer. Basically all that I have to do is warm the stuff up and fry some potatoes.
I usually just eat the beans and cornbread but he like fried potatoes so that's why I didn't fix a lot of them. He also likes them crispy so they are in the process for frying here.
The beans get so thick in the jar that you have to "rake" them out with a spoon. I add a little water to thin them a little. I love having them in the pantry.
So that's what we had for dinner and I didn't have to work for hours preparing it.
PLEASE SHARE!!!
Dehydrating...I love it almost as much as canning. LOL! It saves space, it's easy and so useful. I had a lot of tomatoes from the garden this past summer and after a while I got tired of canning them and not wanting to waste them I finished them up by dehydrating them. Let me tell you, they are so yummy this way.
I started by slicing my tomatoes about 1/4" thick. You don't want them too thick but also not too thin. Tomatoes have tons of water in them so if they are too thin they pretty much just disappear in the dehydrator.
Once completely dried you can grind them into powder. The green on is parsley but the other is my tomato powder. It takes a lot of tomatoes for grinding but tomato powder is great for thickening soups and stews or just to sprinkle for added flavor. I always try to keep it on hand.
This is one of my jars of dehydrated tomato slices. Oh my how I love these! Shew... These are also great for soups, stews, chili, and hydrate fairly well. Of course, dehydrated things never go back exactly as they were before but close. I also love eating them straight from the jar or crumble over a salad. The taste is very powerful. I love them!!!
As you can see they are beautiful in color.
They dehydrate really thin as these were sliced about 1/4" thick.
They store well in a wide mouth mason jar or a storage bag.
I either store mine with oxygen absorbers or seal my jars with a jar sealer that removes all of the oxygen and keeps them crisp. I will post more about how I store my dehydrated items in a later post.
PLEASE SHARE!!!
Well...I canned more Pinto Beans! I love having these on hand, they are so quick and easy.
Here's my process....I have found that 4lbs of dry Pinto Beans will end up being 7 quarts once they are canned. I picked up an 8lb bag for $7.42. That will come out to be 14 quarts at a total cost of
.53 cents per quart!!!!
Since my canner will only hold 7 quarts at a time, I only work with half of the bag at a time. I "look" the beans and rinse, rinse, and rinse some more. Then I put them in a big bowl to soak overnight or 4 to 5 hours. Either one is fine.
As you can see they really plump up after soaking overnight, but again 4-5 hours will be fine too.
Since I know that this will make 7 quarts, I start with 7 hot sterile jars.
I distribute the beans in the jars and try to get close to the same amount in each. This doesn't have to be exact, but you don't want one completely full and another half full....you get the idea, right?
At this point they will look like this...
Now I usually put a strip of bacon in each jar. I don't guess that it really matters but I put it about halfway down in the jar. Not cooked, just a slice of raw bacon. It will cook in the canning process. I didn't have enough bacon this time so each jar ended up with about half of a piece. That's okay because I just add a small spoonful of bacon grease that I always keep on hand. I have done this many times and it works just as well.
I add 1 tsp of salt per jar. This is optional, but this is how I do it.
Now remember these beans are not cooked at this point but they will cook during the canning process. They have only been soaked.
Now it is time to add boiling water over the beans. Be careful!!!
You want to fill them up until you have 1" of head space from the top. Take something and poke down in the jars to get rid of the air bubbles. You might have to add a tiny bit more water after doing this.
This is what they will look like at this point...
You will need a tiny bit of white vinegar to wipe around the rims to remove any grease or anything else so you will have a good clean rim for the lid to stick to.
Simply dip a rag or napkin in the vinegar and wipe the rims.
You need to have your lids soaking in hot/warm water to soften up the seal. Some do this and some don't. I do because it has always worked well for me. Lay your lids on your jars and add your rings.
When adding your rings to your jars, make sure that the rings are ONLY FINGER TIGHT. Not too tight and not too loose. :)
The jars are added to your awaiting pressure canner that has the hot water already waiting in it. Check your manual on your canner to see exactly how much water is needed. Mine says 3 quarts.
These beans are then PRESSURE CANNED for 90 minutes at 10lbs of pressure for my area. Any dried bean or meat needs to be canned for 90 minutes for quarts. These have both so 90 minutes, it is! :)
Once they have been in the canner for 90 minutes they are finished! After the pressure has returned to ZERO open the canner and carefully remove your jars.
As they are cooling on the counter you will hear the "pinging" of the lids sealing. Make sure that if one doesn't seal that you put it in the fridge and use it during the next few days.
You can see that they plump up and are fully cooked. After a day or two the juice will be so thick in the jars that you will have to rake them out of the jar with a spoon.
They are completely done and ready to store or to eat! All you have to do at this point is pop open a jar and heat them up on the stove or the microwave. If you like thinner soup, just add a tiny bit of water. My family likes good thick juice so I usually don't add anymore water. NO COOKING, just heat and serve!!!!
I always have cornbread in the freezer to be popped in the microwave. It takes "1 minute" in my microwave to thaw out a piece of cornbread. Heat up your beans and cornbread and you can have a good heart meal within 2-3 minutes without cooking all day!!!!
PLEASE SHARE!!!
What's for supper? This is Richard's plate...Crock Pot Chicken & Gravy, mashed potatoes and buttermilk cornbread from the freezer. He decided that he wanted the gravy on his mashed potatoes instead of over his chicken. The chicken was cook in the gravy all day in the crock pot.
This chicken is the chicken & gravy that I put in the freezer meals a few days ago. Myself, I like boneless, skinless chicken breast but Richard doesn't care and I bought these chicken leg quarters 10lbs for $3.90. Here is the link to the Chicken & Gravy Freezer Meals.
A few weeks ago I picked up another big 8lb bag of Pinto Beans. I can these 4lbs at a time. 4lbs will make 7 quarts of canned soup beans. So this big bag will make 14 quarts!!! I paid $7.42 for 8lbs so that will come out to .54 cents a quart!!!! Of course, I will add some bacon so that will cost a little more. :) Gotta have bacon!!!!
So I split the bag and will work with 4lbs at a time since my canner only holds 7 quarts. I have "looked" and rinsed these well and will let them soak overnight and get started canning them tomorrow. :)
More photos tomorrow of the process!
PLEASE SHARE!!!
 I made 10 of these but could have easily stretched it to 12. These are so easy, just add what you like. This is what I used...
 18 eggs, scrambled
 Make sure to spray your pans so nothing sticks.
  I fried my hash browns. Richard likes them a little crispy. You could also bake these. I should have just used my griddle but I didn't want to dig it out.
  Dump the 2 pounds of sausage in a large skillet.
 Fry it and drain well...
 Dump all 18 eggs in a bowl. If you don't like a lot of eggs you can use less.
  I added a tiny bit of milk, salt and pepper.
  Eggs are all finished and in a bowl...
 Now to start assembling them...
 Start with the hash browns. Put them in the pans first. They are a perfect fit!
  Put a good layer of sausage on top of the hash browns. I just split up the 2 lbs of sausage in the 10 pans.
 Evenly distribute the scrambled eggs on top of the sausage.
  Add the mushrooms...
 Completely cover with cheese! When these are heated up, the cheese will melt and sorta drip down through on everything else. At this point, just cover with foil and put in the freezer!
  To reheat all you do is...thaw them in the fridge the night before and heat in the oven at 350 for about 10-12 minutes or until the cheese is melted. Everything is cooked ahead of time so all you are doing is heating it up and melting the cheese. You can also remove these from the pans and microwave them.
  When I fix these, I usually make Richard a couple pieces of toast to go with them. Having these already made and ready to heat up sure helps me out when I am fixing him breakfast at 4:30am before work.